Secondary Glazing
I've made my own secondary glazing for a few rooms in the house. I'll write these up when I get the chance, but I wanted to cover the front door in particular, as it's an interesting way to add secondary glazing and should be accessible to pretty much everyone without the need for specialist tools.
Choosing the glazing
For the door, as I saw it, I had two options for the glazing material. I would either have to use safety glass or a plastic such as acrylic or polycarbonate.
I actually had two sheets of acrylic left over from building a shed, so I decided to use those. Acrylic sheets are readily available to buy from places such as Wickes or The Plastic Man.
Fixing the glazing to the door
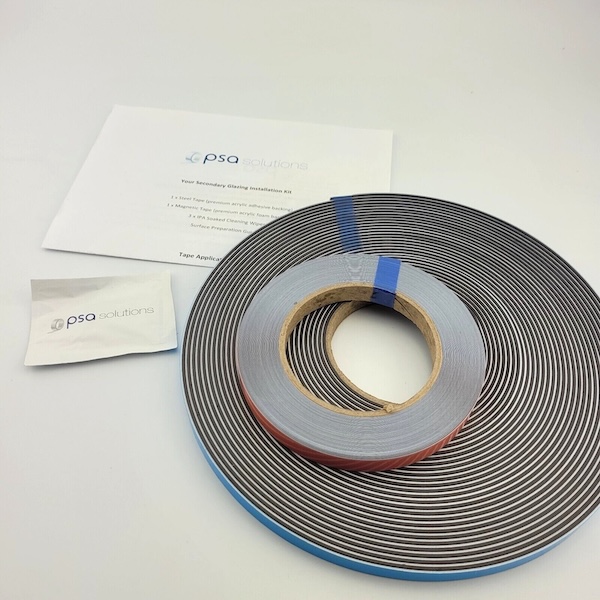
To hold the glazing to the door, I used magnetic tape. I wanted to be able to easily remove the glazing so I could clean between the two panes.
Another option would be to create a profile from timber and make some clips or hinges to hold the panel in place. The main advantage of using magnetic tape, however, is that the whole process is quick and easy.
I purchased 15m of steel tape and magnetic strip for £25 on eBay in August 2026. This is the tape I used.
Cutting the acrylic
I cut the acrylic sheet by scoring it with a knife. I then positioned the scored line along the edge of a table, placed a piece of timber on top and snapped the acrylic cleanly along the scored line.
You need to score the sheet quite a few times – I did it around 20 times on both sides using a fresh blade.
Fitting the magnetic strips
I stuck the steel tape to the acrylic and then attached the magnetic tape to the steel tape. This allowed me to position the whole panel exactly where I wanted it on the door.
Once I was happy with the position, I removed the backing from the magnetic tape one side at a time and pressed it firmly into place. Doing it this way meant everything lined up perfectly.
Making it look better
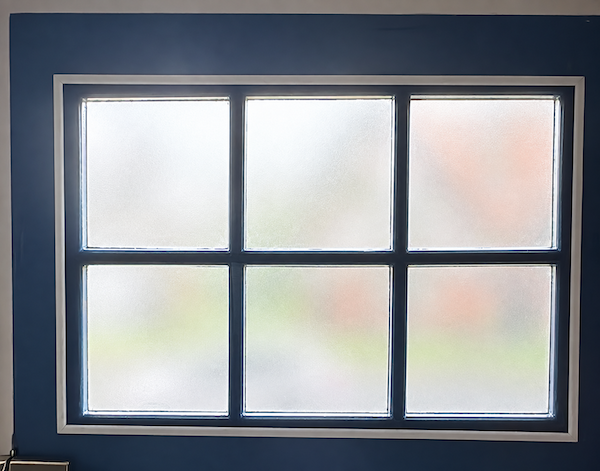
Having done this, I wasn't particularly happy with how it looked. The white border stood out too much against the dark blue door.
To improve the appearance, I purchased some pine "hockey stick" moulding made by Cheshire Mouldings.
I bought mine from a local builders' merchant, where it was about £2 per length, compared with around £8 per length at Wickes.
I measured and dry-fitted the moulding first, cutting a 45-degree mitre at each corner.
I then painted the moulding using the same paint as the door. Once the paint was dry, I glued the mitred corners together. I applied wood glue to the side lip of the hockey stick moulding and used masking tape to hold it firmly against the acrylic while the glue set.
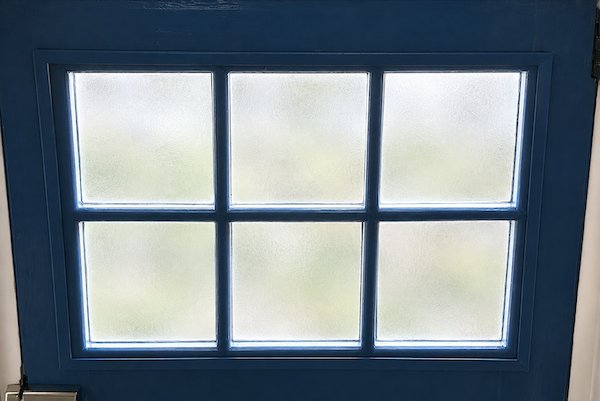
Once everything had dried, I put the secondary glazing back onto the door. Hopefully you'll agree that it looks much better!
How much did it cost?
The secondary glazing cost me no more than £30, and I still have plenty of magnetic and steel tape left over to use elsewhere in the house.
A secondary glazing company would likely charge hundreds of pounds for this type of job, so doing it yourself can make a lot of sense – particularly for a relatively straightforward window like this one.
Does secondary glazing actually work?
One question I often get asked about secondary glazing is: "Does it work?"
The answer is yes.
For me, the most noticeable difference is the reduction in noise. Having another layer of glass or acrylic makes a significant difference to road noise and even reduces the sound of people talking outside.
There are thermal benefits too, but the improvement in noise is something you notice immediately. For a relatively inexpensive DIY project, I've been very pleased with the result.
Published: 6th September 2026
Last updated: 6th September 2026